As a new pet owner or a seasoned traveler with a furry companion, being prepared for emergencies is crucial. Accidents can happen anytime—at home, on a hike, or during a road trip. Having a reliable first aid kit for dogs, curated with expertise like that of Dr. Hill, ensures your pet’s safety and gives you peace of mind.
Let’s walk through everything you need to know about assembling and using a dog first aid kit that meets both home and travel needs.
Why Every New Pet Owner and Traveling Pet Parent Needs a Dog First Aid Kit
Common Emergencies While Traveling or at Home
Dogs are curious by nature. Whether it’s a paw pad cut from a sharp rock, a bee sting at the park, or ingesting something they shouldn’t have, minor emergencies are common. When every second counts, having quick access to wound care, medication, and tools can make all the difference.
The Role of a Curated Kit & Guide by Dr. Leah Hill
Dr. Hill, a leading veterinarian with decades of emergency treatment experience, emphasizes the importance of readiness. A properly curated pet first aid kit for dogs is more than a checklist—it’s a life-saving resource. Dr. Hill’s recommendations form the core of this guide to ensure every item serves a purpose and is safe for pets.
Essential Supplies for a Pet First Aid Kit
Bandages & Wound Care
Wound management is a top priority. Your kit should include:
· Sterile gauze pads
· Self-adhesive wrap (like Vetrap)
· Non-stick bandages
· Cotton rolls
· Medical tape
These materials help stop bleeding, protect injuries, and prevent infection.
Disinfectants & Ointments
To safely clean wounds and reduce infection risk:
· Chlorhexidine solution or pet-safe antiseptic wipes
· Antibacterial ointment (like Neosporin – vet-approved for topical use)
Tools: Scissors, Tweezers, Thermometer
No kit is complete without these:
· Blunt-tipped scissors for trimming fur around wounds
· Tweezers for removing splinters or ticks
· Digital rectal thermometer
· Flashlight
Medications: Pain Relief, Anti-diarrheal, Antihistamines (vet-approved)
Always consult your vet before using medications, but commonly included items are:
· Buffered aspirin (dosage by vet only)
· Diphenhydramine (Benadryl) for allergic reactions
· Anti-diarrheal tablets or kaolin/pectin products
· Electrolyte solutions like Pedialyte
Other Must-Haves: Gloves, Styptic Powder, Muzzle
· Latex or nitrile gloves for hygiene
· Styptic powder or cornstarch to stop minor bleeding (e.g., from nail trimming)
· Muzzle – even the gentlest pet may bite when in pain
How to Treat an Injured Dog or Cat: Step-by-Step Guide
Assessing the Injury
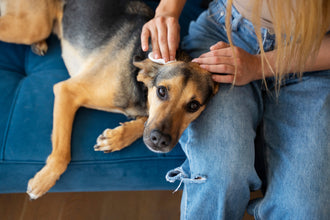
Stay calm and speak in a soothing tone. Observe:
· Level of consciousness
· Breathing pattern
· Location and severity of injury
Do a quick triage and decide whether it's manageable or requires emergency care.
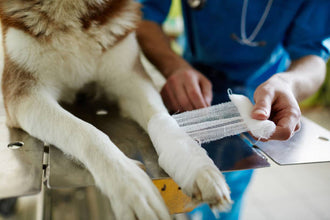
Cleaning & Dressing Wounds
1. Muzzle your dog if needed.
2. Use antiseptic wipes or diluted chlorhexidine to clean the wound.
3. Apply ointment and cover with non-stick gauze.
4. Wrap with adhesive or self-stick bandage—but not too tightly.
5. Monitor for swelling or signs of infection.
When to Seek Veterinary Help
If you notice:
· Profuse bleeding
· Breathing difficulty
· Ingested toxins
· Fractures or limping
· Persistent vomiting or diarrhea
Seek professional care immediately. First aid buys you time—it’s not a substitute for veterinary treatment.
Specialized Items for Travel
Portable Water & Food Containers
Staying hydrated during travel prevents fatigue and overheating. Use collapsible bowls or pet travel water bottles that are lightweight and spill-proof.
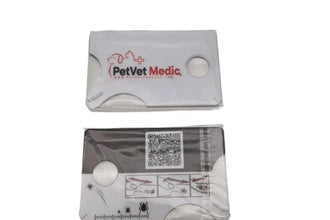
Emergency Contact & Medical Info Card
Keep a laminated card with:
· Vet’s contact info
· Emergency vet clinic details in your destination area
· Pet’s medical history and allergies
This is crucial if someone else needs to help your pet in your absence.
Lightweight Cooling & Heat Packs
For outdoor adventures:
· Cooling packs help with overheating or after a strenuous hike
· Heat packs provide comfort in cold weather or ease joint pain
These items should be activated easily without additional tools.
How to Store and Maintain Your Kit
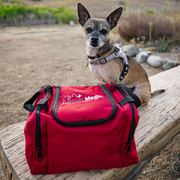
Choosing the Right Carry Case
Opt for:
· Waterproof, durable containers
· Multiple compartments for easy access
· Portable size for car travel or hikes
A clear labeling system helps you quickly find what you need during stress.
Restocking & Expiry Checks
· Review your kit every 3–6 months
· Replace expired medications and dried-out bandages
· Check batteries in flashlight and thermometer
Keeping your kit updated ensures it’s effective when needed.
Dr. Hill’s Tips: Best Practices for Pet First Aid
Training and Preparedness
Dr. Hill recommends every pet owner take a basic pet first aid course. These teach you:
· CPR for pets
· Wound dressing techniques
· Signs of common illnesses
Local humane societies or veterinary clinics often offer these courses.
Regular Practice Drills with Your Pet
Practice makes perfect. Role-play a basic wound scenario or muzzle application so your dog becomes familiar with the process. This reduces fear and struggle during real emergencies.
Conclusion & Next Steps
Building a first aid kit for dogs isn’t just a checklist—it’s a commitment to your pet’s well-being. With guidance from Dr. Hill and a practical approach tailored to your lifestyle, you’ll be ready for most emergencies, whether at home or on the road.
Be ready. Stay calm. Keep tails wagging.


